Vbox
VBox permet d'identifier l'utilisateur avec le blockchain
Avec VBox
Vous pouvez :
- Obtenir un identifiant unique - NBdomain.
- Payer ou recevoir des paiements.
- Avoir accès à une infinité d'applications blockchain.
Qu'est-ce que Vbox ?
Vbox est un outil de gestion des identités blockchain. Il peut vous aider à construire des identités chiffrées sur l'appareil local avec un simple mot de passe. Toutes les applications blockchain peuvent demander la signature et le paiement via Vbox.
Enregistrez-vous dans le Cloud Vbox et obtenez un NBdomain gratuit
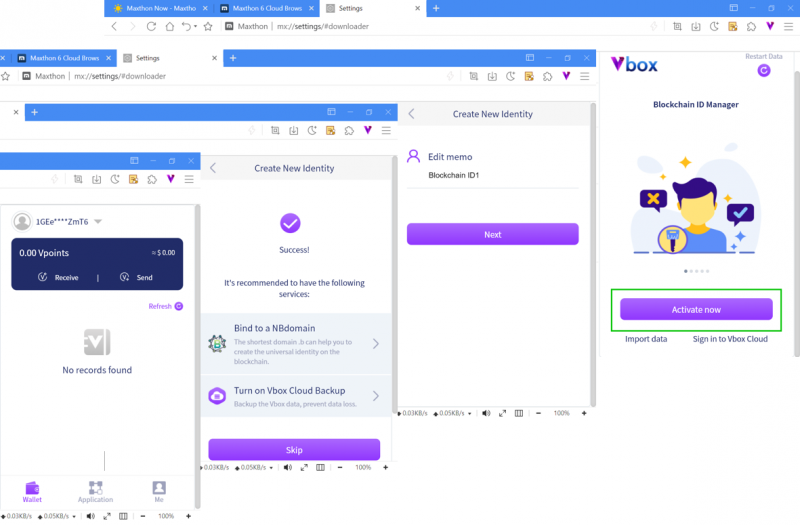
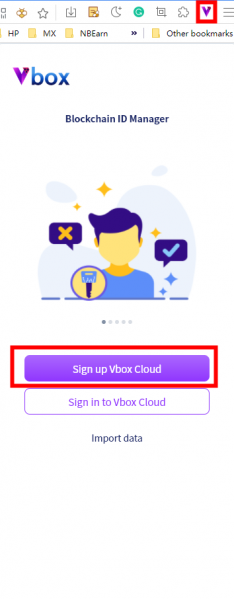
- En haut à droite du navigateur, cliquez sur l'icône Vbox
 pour ouvrir l'application Vbox.
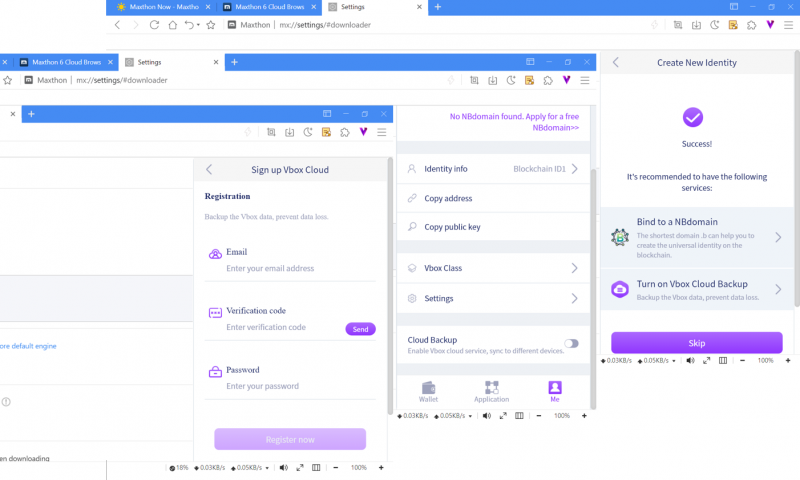
 - Sur la page de démarrage de Vbox, cliquez sur Sign up Vbox cloud.
- Il existe deux façons de s'inscrire dans le Cloud Vbox : par numéro de téléphone mobile ou par adresse e-mail.
- Il est fortement recommandé d'enregistrer le compte avec votre numéro de téléphone mobile. Car vous pouvez obtenir un NBdomain gratuit en vous inscrivant avec votre numéro de téléphone.
- NBdomain est un nom de domaine blockchain et un identifiant global. Vous trouverez plus d'informations sur NBdomain sur les sites https://nbdomain.com et https://medium.com/@nbdomain.
- Vous pouvez obtenir le domaine gratuit plus tard si vous vous inscrivez avec votre e-mail. Mais un numéro de téléphone mobile est toujours nécessaire.
- Après l'inscription, vous devez personnaliser le nom et le mot de passe de l'ID, puis vous serez prêt.
Demandez le NBdomain gratuit
Demandez un NBdomain :
- Les utilisateurs de Vbox peuvent demander un NBdomain gratuitement avec un numéro de téléphone.
- Vous pouvez cliquer sur Bind to NBdomain sur la page de confirmation de l'enregistrement ou le demander à partir de Vbox> Me.
Lier NBdomain & Personnaliser NBdomain
Un ID Vbox peut lier plusieurs NBdomains, et vous pouvez choisir l'un d'entre eux pour l'utiliser comme nom d'identité. Pour le gérer, vous pouvez ouvrir ME> Bind to an NBdomain pour le visualiser et le personnaliser.
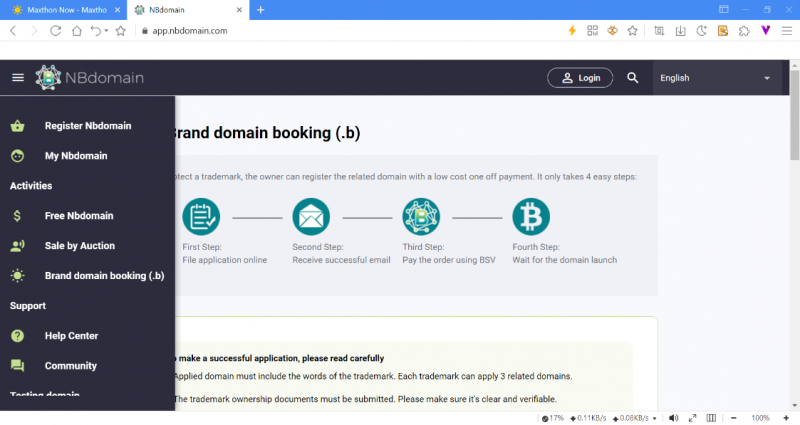
Le NBdomain gratuit est une chaîne de chiffres. Si vous souhaitez demander des domaines NB personnalisés, cliquez sur Apply for more super domains sur la page Bind to an NBdoamin. Vous pouvez également vous connecter à https://app.nbdomain.com/ pour vous inscrire.
Recherchez le domaine que vous souhaitez enregistrer, et s'il n'est pas déjà enregistré, vous pouvez en faire la demande.
Note : Le nom de domaine nouvellement acheté sera lié à l'adresse du portefeuille que vous utilisez pour le paiement. Si vous voulez le modifier, vous pouvez utiliser la commande Transfer dans la page de gestion de NBdomain après l'enregistrement réussi.
Changer l'avatar de NBdomain
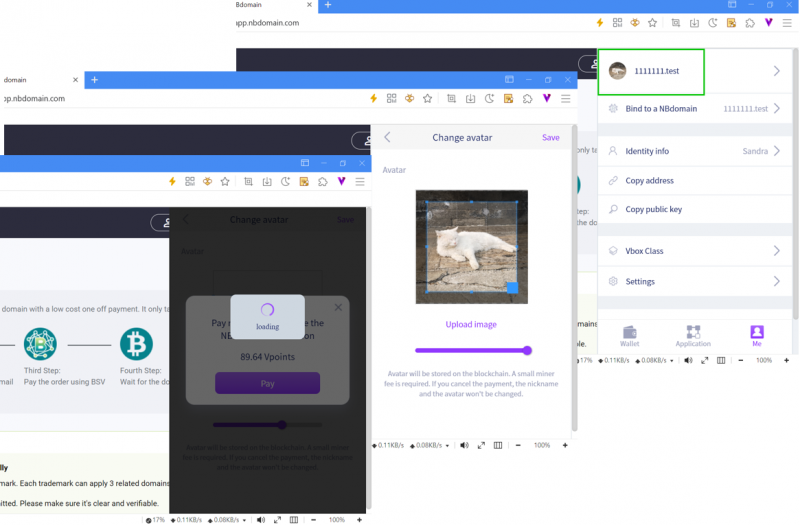
Vous pouvez définir un avatar d'un NBdomain et il sera utilisé comme avatar de votre ID Vbox.
Ouvrez ME, puis cliquez sur le domaine pour personnaliser l'avatar.
Note: Cette opération va stocker des informations sur la Blockchain et nécessite une petite commission de mineur. Elle sera déduite directement du compte courant après confirmation. Un solde insuffisant entraînera l'échec de la modification.
Gérer les biens numériques
Le portefeuille Vbox peut vous aider à gérer les actifs de la Blockchain - les Vpoints.
1 Vpoint = 1 millionième de BSV
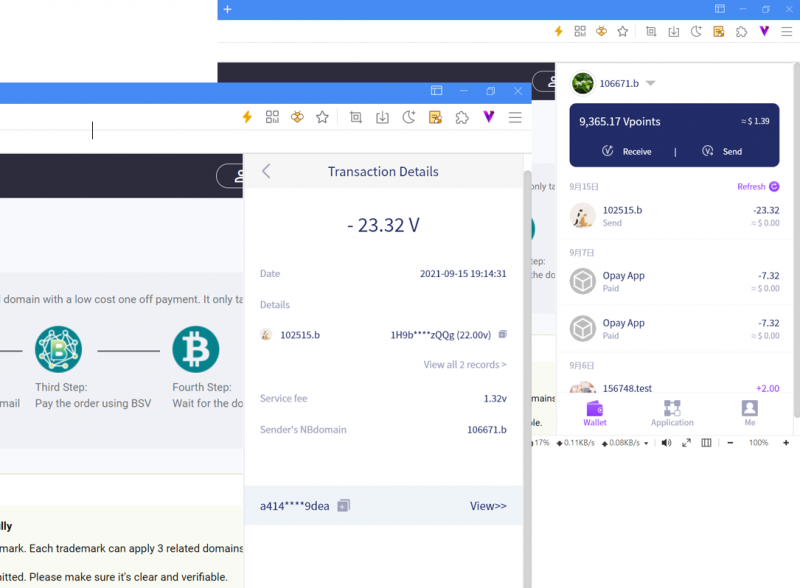
L'utilisation du portefeuille Vbox permet de voir le montant total des actifs et les transactions en temps réel, cliquez sur une seule transaction pour ouvrir les détails de la transaction, ou View>> peut également ouvrir la page de détails de la transaction on-chain.
Vpoint Collection & Top-up
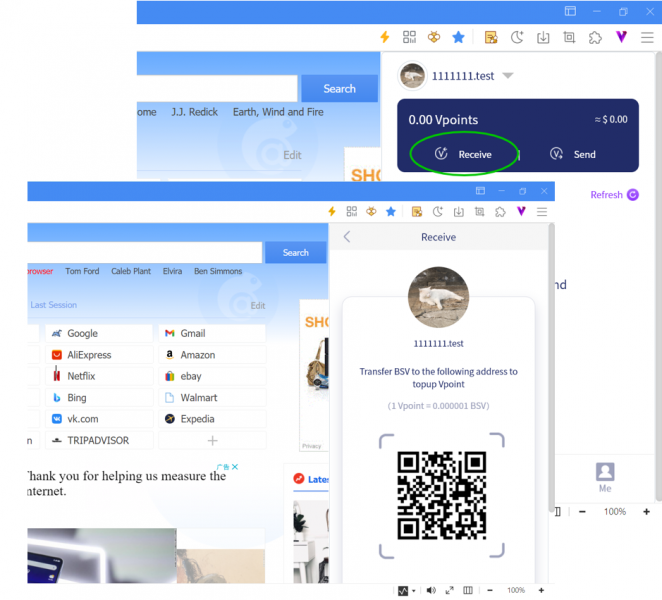
Open Vbox, click Receive to display the collection QR code. Other parties can transfer money through this code.
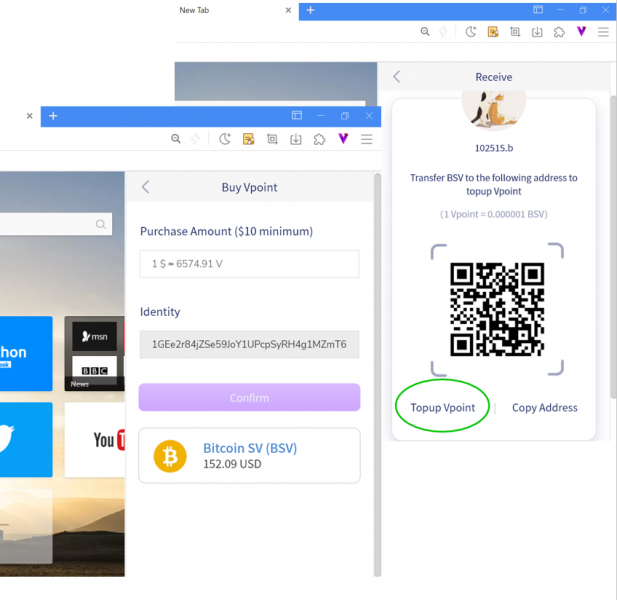
If you want to buy some Vpoints, you can click Top up Vpoint.
After transferring money to the specified QR code, click Payment Complete, enter the verification code, and click on Confirm to get Vpoints.
Vpoints Transfer
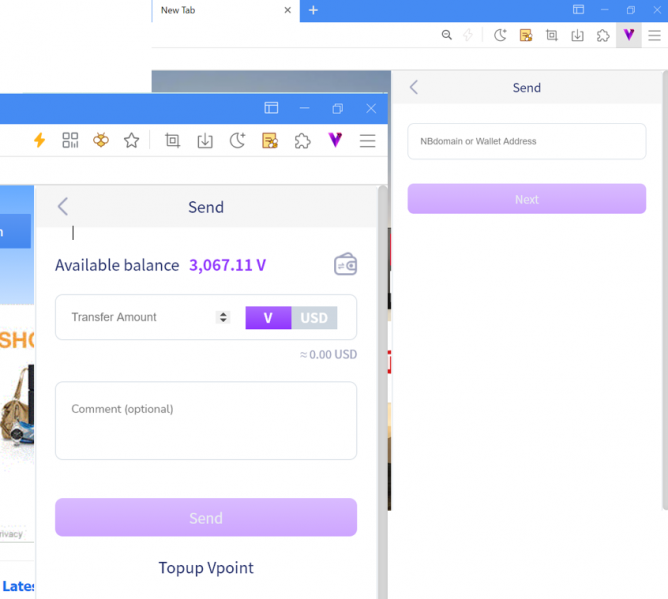
Open Vbox, click Send to enter the Transfer page, then enter the transfer address or NBdomain.
You can leave a message for each other while transferring money, and the message will display as a conversation in the transaction message.
Switch Vbox ID
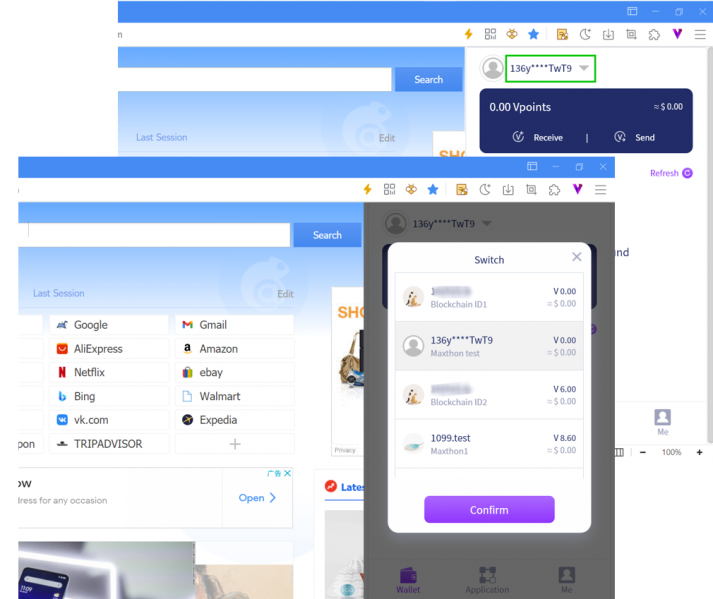
You can create multiple Vbox IDs in Maxthon, and every ID has the individual private key and payment address. The private key and payment address info cannot be modified.
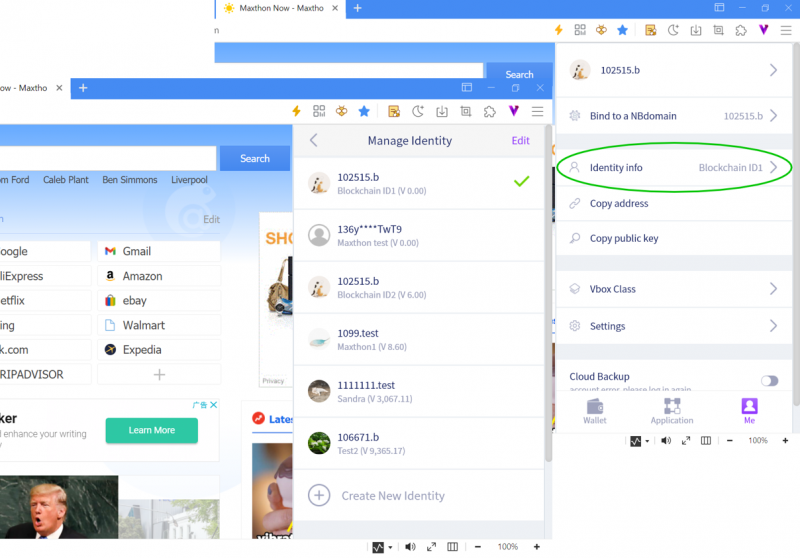
Open Vbox > Me > Identity info, enter Manage Identity:
- Create a new identity: create a new Vbox ID, get the private key and wallet address
- Switch current identity: after switching the identity, it will auto-refresh and display on the external card
- Edit identity
- Change remark: change the ID remark
- Delete identity: delete all ID information, including encrypted data; the identity can not recover after deletion; please use this function carefully.
At the top of the wallet, you can click the identity to switch it quickly.
Sign in with Vbox
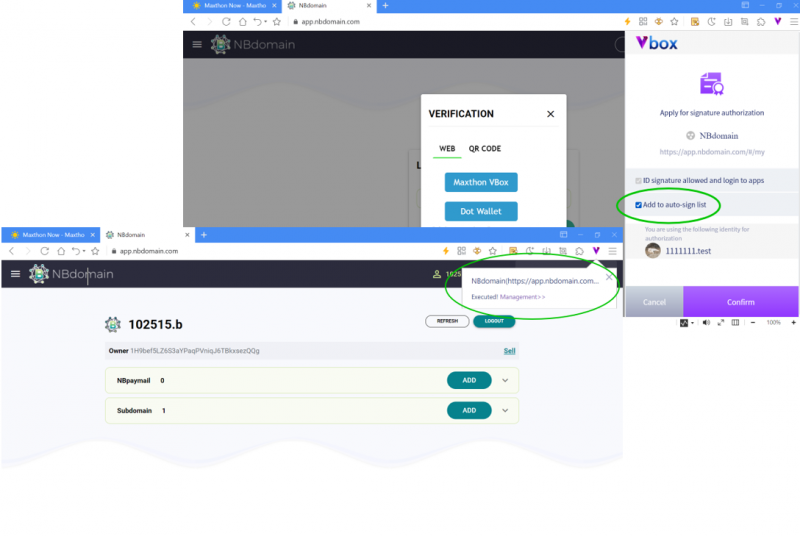
Vbox can be used for identification and signature, and it can be seen as a private key manager. When a website needs to use the private key as authentication for login or authorization, without passing the actual private key to the third-party application, Vbox can perform cryptographic verification and signature for you to prove your identity and asset ownership.
Note: When authorizing, check Add to auto-sign-in list; then Vbox will do the authorization for you automatically in the background in the future for such dApp.
Use Vbox Payment
One of the core functions of Vbox is to serve as a BSV wallet that responds to BSV payments in the application and completes them quickly.
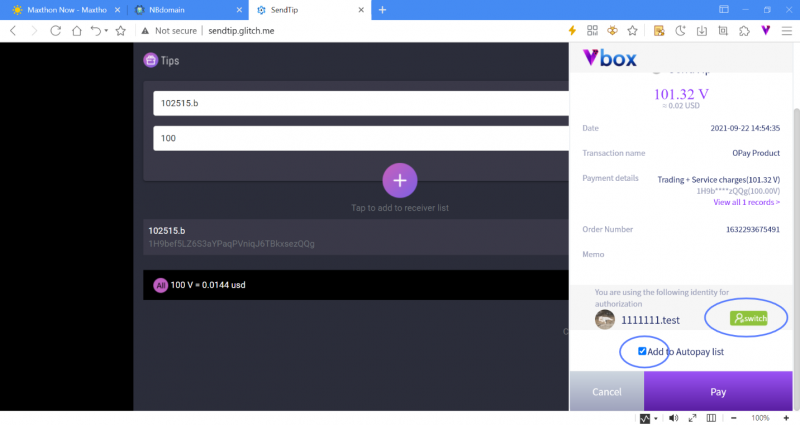
When making a BSV third-party payment, if you are using Maxthon, you can select Vbox for payment:
- You can switch the identity to any local wallet.
- After checking Add to autopay list, payments from this application/domain for transactions within the automatic payment limit can be completed automatically in the background without password verification.
Authorization & Password-free Settings
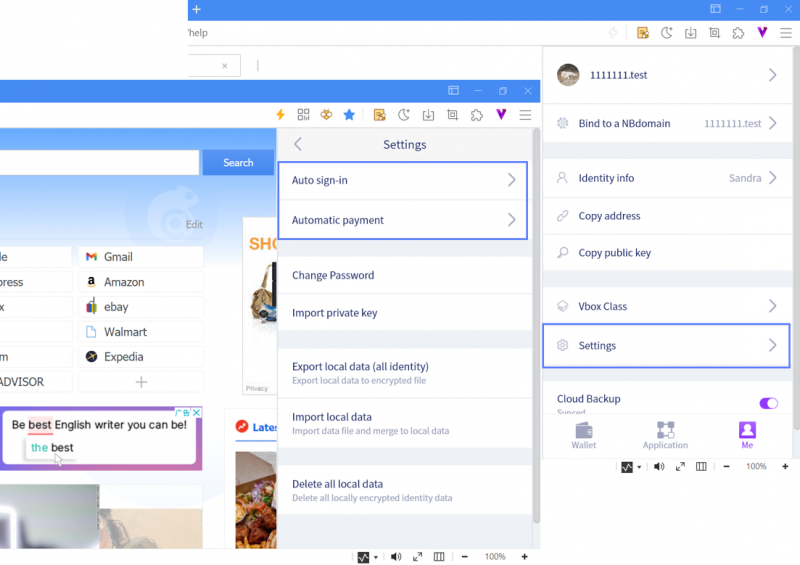
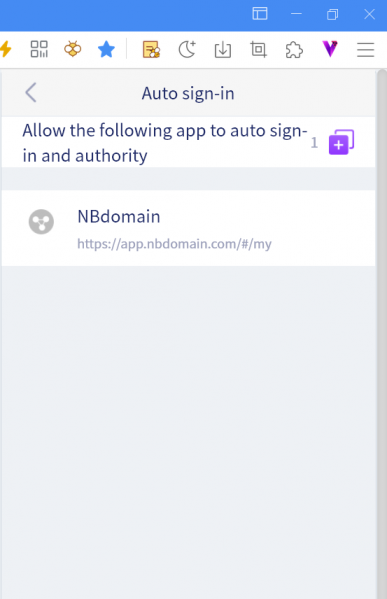
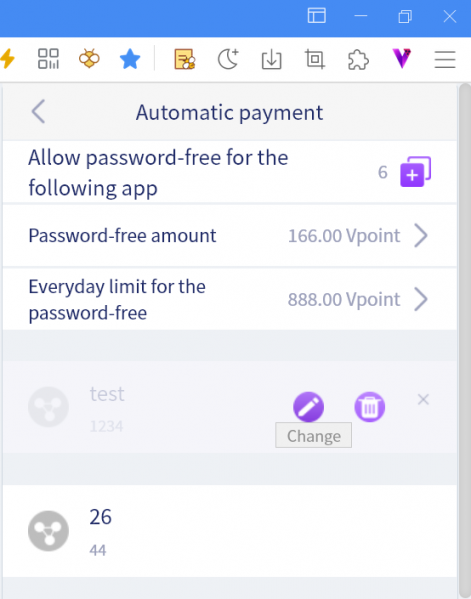
Open Vbox > Me > Settings > Auto sign-in/ Automatic payment
Manage Auto Sign-in
- Items that checked Add to Auto sign-in at the time of authorization will be automatically added here.
- In addition, you can add a website or application to the Auto sign-in list by the domain.
- Click on the list item to modify the item domain or remove it from the list.
Manage Automatic Payment
- Items with Add to Auto-pay list checked during the third-party payment will be added here automatically; in addition, you can add websites or applications to the Auto-pay list by the domain.
- Set Password free limit, the upper limit of the auto-pay, the transaction over this limit needs to be confirmed with the password, and the default is 100 Vpoints.
- Set Everyday limit of the password-free, the total limit of using free payment per day, the accumulated amount over this limit needs to use password to confirm, the default amount is 1 million Vpoints (1BSV)
Create Identity by Importing Private Key
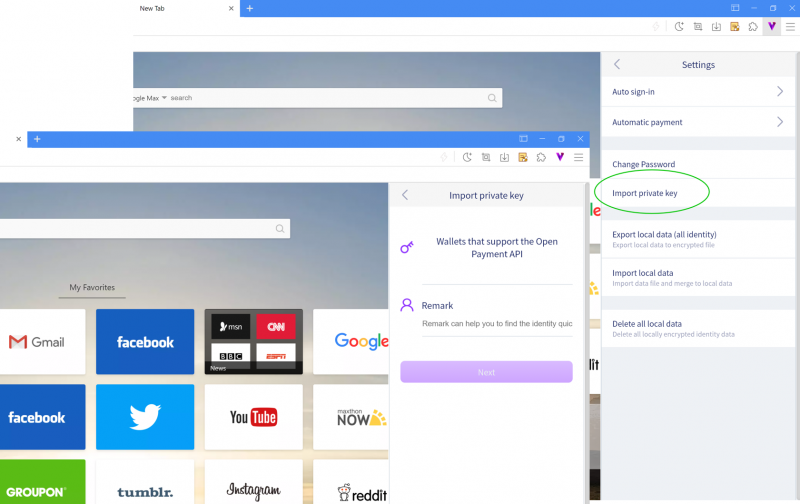
If you have the BSV wallet, you can import the private key in Me > Settings > Import private key, then create a new Vbox identity.
Auto-sync
For avoiding data loss, Vbox provides the data sync function.
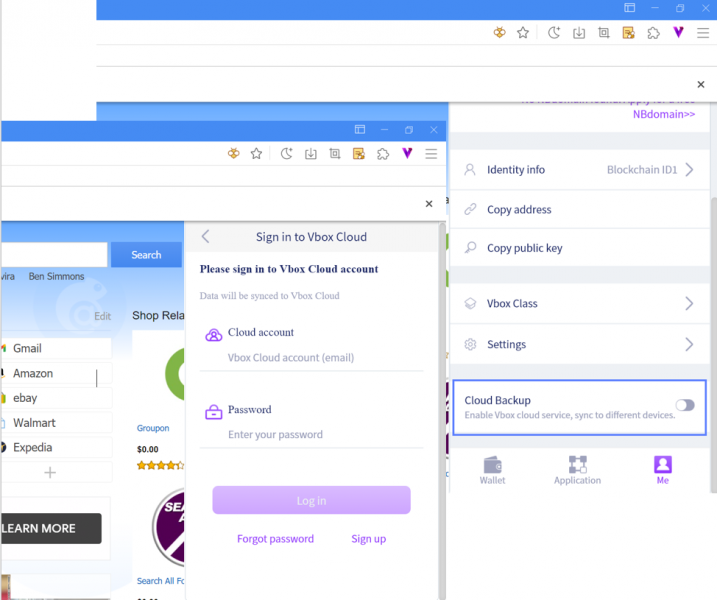
- Open Vbox > Me > Cloud Backup, sign in to your Vbox account.
- Using the Vbox Cloud account, you can sync Vbox identity with multiple devices.
Note: Vbox Cloud account can sync all local data and save all identities. If the local data is not the same as the local data, it will merge the local data to the Cloud data to avoid data loss.
Import/Export Vbox Local Data
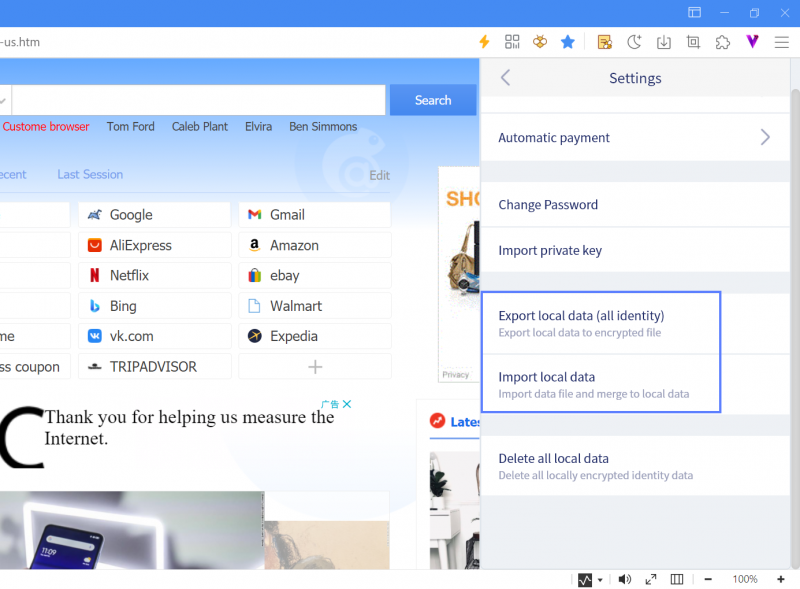
Besides using the cloud backup feature, you can also maintain data security by importing/exporting local data from Vbox. Open Vbox > Me > Settings, select Export local data to export all identity data (.v) files; select Import local data to open the identity data (.v) files saved on the local, and the imported data will be merged with the local data to protect data security if there is any difference.
Clear Vbox Local data
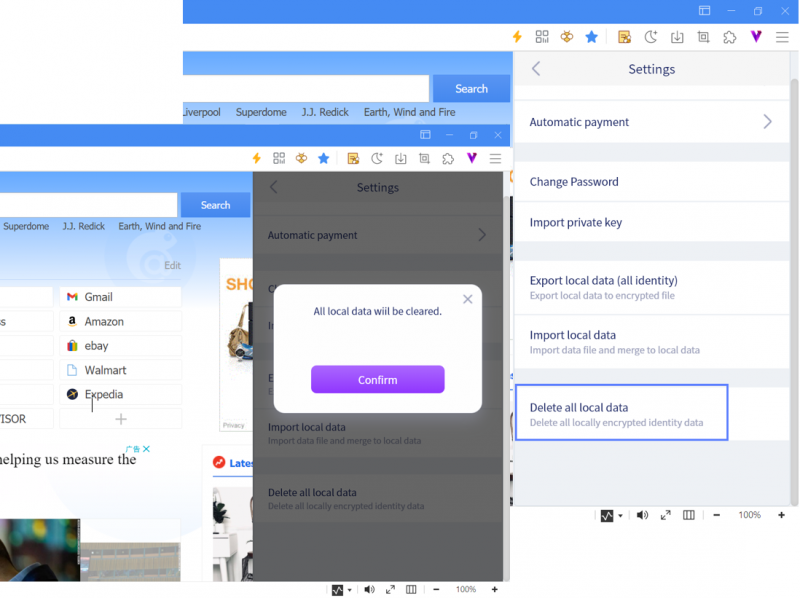
Open Vbox > Me, click Delete all local data, it will clear all local data and restore the Vbox to the unactivated status. Local data cannot recover after deletion, and please use this feature carefully.
Note: If you turn on the Vbox Cloud account, it will pop up the window to let you confirm to delete the Cloud data or not; if you check it, the Cloud data will be deleted also. If you uncheck, the account will turn off sync automatically, then clear the local data.
